One of the most common struggles of a music producer is to create a sense of vibrant, realistic depth in a track. It usually comes together with the feeling that “this could be done way better”. Maybe you’ve had to endure comments like “your track sounds too flat” or “that’s way too two-dimensional” on your creations.
You’ve probably realized that you need to work on your depth-creating abilities when producing music, but how and where do you start? You probably already know that reverbs emulate the echoing acoustics of different spaces… but throwing a bunch of reverbs in randomly doesn’t quite seem to do it. What exactly is depth? How can we even perceive the depth of sounds?
Many questions… but we’re here to assist you in creating awesome depth. Let’s dive right in with 5 steps to create depth in your mix.
1.Contrast
Having contrast in your track is vital for depth. Picture this…
It’s a beautiful, sunny day in early summer. Your legs are sore, but with the promise of an amazing view, you push the last distance up the great hill ahead. Finally, you reach the summit. The lush forest and sturdy mountains seem to go on endlessly… You close your eyes for a few seconds to soak in the view.

Now imagine you take out one of the trees that you saw from a great distance and put it in an endless Matrix-like white room with nothing else in it. With no recollection of its’ distance from the summit, would you still be able to assess how far it is?
For all you know, it could just be a very small tree, very close to you. Or it could be absolutely massive. Without anything to compare it too and without depth, you can’t assess size.
How exactly does this apply to music production?
Imagine if you, in your new track, only used sounds that are upfront and in your face. It could sound pretty nice, but without any effects, there would basically be no audible depth. The track would just sound dry and two-dimensional.
Take that same track and add some reverbs. Now we have another diffused dimension that feels like it’s “behind” your dryer sounds. Going a step further, what if you edit some of the sounds in your arrangement to sound like they are further back in the mix? Mixing these two types of sounds would create contrast and depth.
See article: 10 Mixing Mistakes To Avoid
2.EQ
The frequencies of sounds change depending on their distance. A human voice heard in front of you will have different frequency spectrum than the same voice heard from a hundred meters.
Here’s a simple rule of thumb:
- Sounds heard from a close distance: more high and low frequencies. Higher frequency sounds are generally perceived as "closer".
- Sounds heard from a far distance: less low and high frequencies, generally in the mid frequency zone.
If lead sounds and lead vocals should be at the forefront of your mix, these should be brighter and more distinct than the rest of the sounds.
Let’s say you have a sweeping pad sound that’s playing simultaneously to your lead instrument/vocal. The pad should have less high frequencies to create the illusion that it’s sitting "behind" your lead instruments.
You may use a lowpass filter to remove some of deep low-end, and use a highpass filter and remove some high-end. It could look something like this:

Position your instruments
Using this technique, the pad gets a secondary focus. Your lead sounds and percussion will now dominate your high-end and stay positioned at the forefront. The pad will sound as if it’s further back.
Bonus tips:
- You can control the illusion of depth by how much low and highs you cut
- There are no limits to sounds you can apply this too – experiment!
- Don’t forget to remove harsh peaks and do the usual “EQ” work
- Combine this technique with reverb or delay effects for the greatest realism
See article: Mixing in Mono: Why & Why Not
3.Reverb
Reverb is probably the effect that pops into your head first when thinking about creating depth in your mix. You’re absolutely right – reverb is the effect for creating virtual spaces in your mix. This directly affects perceived depth.
What is reverb?
If you’ve played around in Ableton Live (or yelled something in a huge space), you probably know what the typical reverb effect sounds like.
It’s a reflection of sounds of different spaces. The reverb effect in music production is re-creating this sound phenomenon, most commonly by using mathematical delay-type algorithms. The effect distorts and reflects the audio signal in the sound characteristics of various rooms.
For example (using Ableton’s reverb as an example)…
A Small Room reverb has the following characteristics:
- Decay time: 850 ms
- Size: 3.00
- Predelay: 10.0 ms
A Large Hall reverb has the following characteristics:
- Predelay: 65.0 ms
- Decay time: 2.80 s
- Size: 80.00
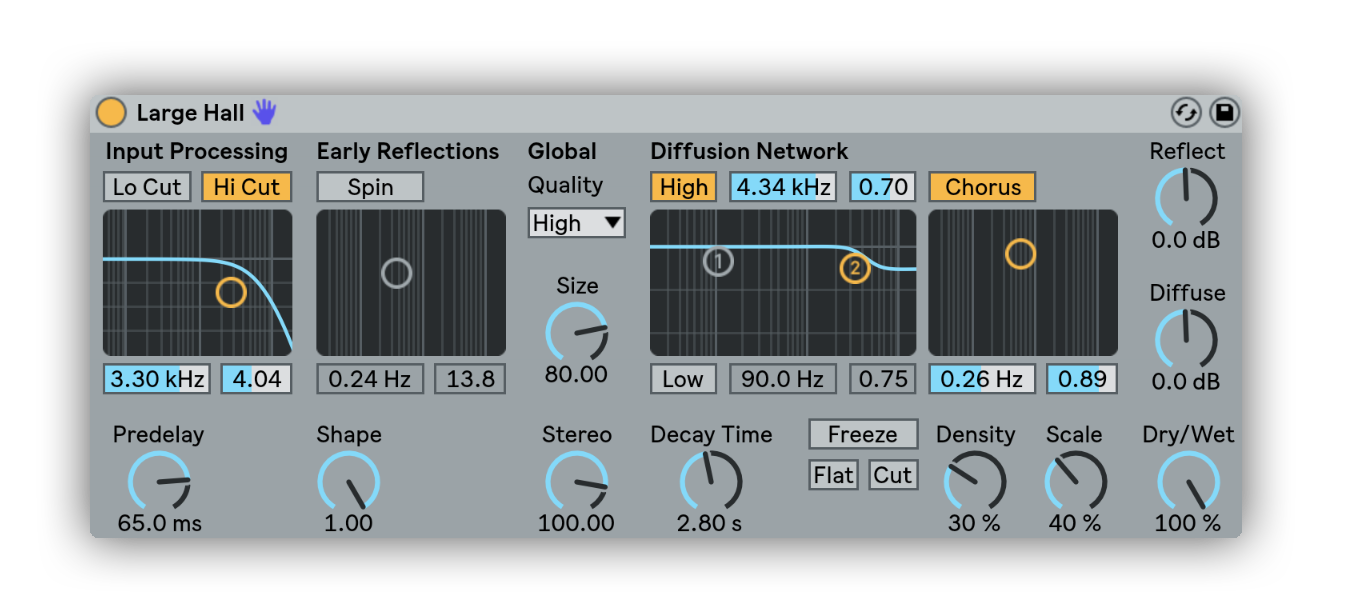
The numbers in the larger hall reverb are a lot higher for all these settings.
What do these settings mean anyway?
Decay time
The decay is the time it will take for the reflections to stop. If you set a long decay time, the reverb reflections will be heard for longer, which simulates a larger space. A shorter decay time simulates a smaller room because the reflections die out quicker in a small space.
Size
It means, as you probably could have guessed, the size of the room. The lowest value of 0.22 means the smallest room, equal to a tiny bathroom. The highest of 500.00 means a huge cathedral.
Predelay
Predelay means how long it takes for reverb to be heard. Imagine you are standing in an extremely large church, shouting “HEY!”. The echo will not be heard instantly but will be a bit delayed due to the mere size of the space. It will take a while for the sound to bounce.
How to use reverb in your mix
Can you just throw random reverbs on the sounds in your mix and call it a day? Well, you can, but in order to create the best depth in your mix, you really shouldn’t. Reverb needs a bit of planning before-hand.
Match your reverbs to your story
Say, for example, you want to create a track with a huge sound stage. Epic strings, heavy battle drums, and a deep piano to accompany it. Long, large reverbs are probably the best route to go, as thin, subtle reverbs wouldn’t quite portray the feeling.
When using reverbs to create depth in your mix, do this:
- Start off with the basics, then experiment
- Group your reverbs – use the same reverb for similar sounds (guitars for example)
- Consider what feeling you want to convey,
- Use reverb sparingly, don’t soak everything in reverb
- Having both dry and reverb-heavy elements makes for a nice contrast
- Use reverb buses for maximum control – don’t clutter reverbs
- Equalize and sidechain your reverbs to fit better in your mix
See Article: 5 Essential Mixing Tips
4.Delay
The delay effect repeats your chosen audio signal. It plays the signal back, often in a rhythm matching the tempo of your track. It usually comes with a few settings.
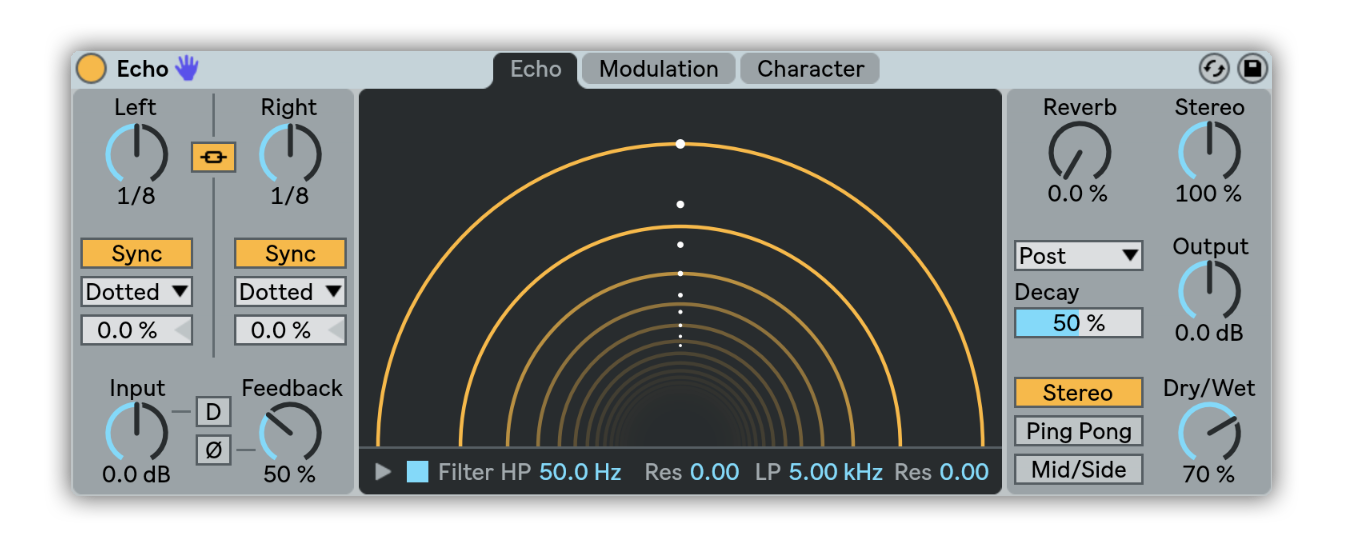
Most delays can be set to beats like 1/1, 1/2, 1/4, 1/8, 1/16, 1/32 and have an option for choosing milliseconds is often included. A delay can also, depending on the model, distort and twist the repeated signal for a more experimental result.
How to use delay in your mix
Similarly to reverbs, you should use different settings in different contexts.
It depends on:
- Types of sounds and instruments used
- How huge you want your mix to be
- What feelings you want to convey to the listener
There are some very specific delays that sound amazing on the instruments they are intended for…
Slapping delays
Slappers are very short delays, with little to no feedback, that add both depth and extra energy to your sounds. These are often used very subtly as a way to make a signal less dry, without impacting the dry sound too much. The result is a more fluid, spacious sound that fits better in the mix.
Longer delays
Tape and analog style delays are amazing for a more trippy space effect. Commonly used as long delays, in beats ranging from 1/2 to 1/16, they are great for sounds you really want to echo into the depth of your mix.
For most delays, except slap delays with are better left a bit off-beat, experiment with how the delay fits in with your tracks rhythm. See if 1/8 sounds better than 1/4, and don’t forget triplets. If your track is straight 1/4, triplets can really add an extra dimension to the groove, filling in the rhythmic gaps.
When using delays to create depth in your mix, do this:
- Use delay buses to leave your original audio signal intact
- Try side chaining your delays to your kick drum and/or other sounds
- Automate your delays to change things up
- Be mindful of how your delay plays into your groove
- Use the low and high pass filters of your delay to shape the sound
- Try a subtle slap delay on your guitars and vocals
See article: 5 Tips For A Better Mix
5.Space
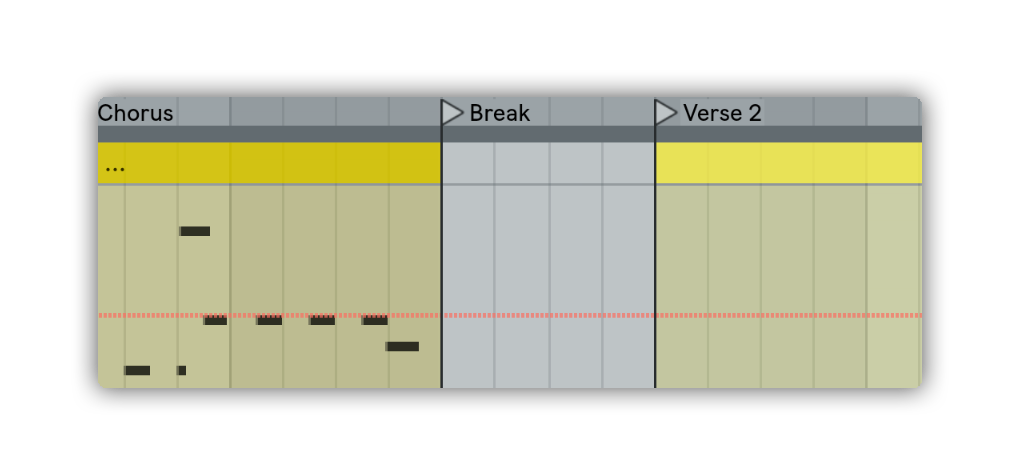
What we mean with “space” is that in order to create depth in your mix, you have to be able to hear it. At least sometimes. Full mixes with many different sounds are great, but sometimes it can be hard to make out space without having any silence. Having a part where only a few instruments play is a great way of creating space and ultimately depth in your mix.
Do this to create space:
After your tracks highest peak, remove some of the instruments and give the listener a sense of the space in your mix. Let your reverbs and delays fully ring and show off that sweet contrast of yours. For the best effect, make sure you leave something at the forefront of your mix for comparison, maybe a hihat or a kickdrum.
To summarize…
In order to create depth in your mix, follow these steps:
- Create contrast – use both sounds that are up-front and in the back for great depth.
- Use equalizer – equalize your sounds with depth in mind.
- Reverb – use reverbs to create virtual spaces in your mix.
- Delay – use delays to add depth and rhythm.
- Space –space makes the listener aware of the space and depth of your mix.
Now you have the 5 ultimate steps to create depth in your mix. Get out there and create some deep mixes!
|
Pelle Sundin is a Swedish music producer and freelance copywriter, currently active with his chillout project PLMTRZ. He also produces psychedelic trance. When he's not producing music, he surfs, skates and chugs coffee. |

|
Check out our in-depth music production courses, for example:
Watch intro:
|