Written walk-through guide - coming alongside this Youtube Tutorial:
|
What we used:
|
Also available: 4h+ Course: Track from Start To Finish |
Part 1 - Drums - Steps:
- Setting up a side-chain track
- Adding a Kick
- Adding a Snare
- Adding in another Pre-Snare
- Closed Off-Hihat (1)
- Closed Off-Hihat (2)
- Dynamics Hihat
- 16ths Hihats
- Blip Noise
- Ride
Hey! Today we're going to make a Deep House track from scratch using Ableton instruments only. Here's a quick preview of the track we're going to be making:
Alright, let's get into the production process! In this part we're going to focus on drums only. But before that, you need to know that the first thing I always add is...
I. Sidechain track
It's a very important part of deep house production. Sidechain compression is an effect which turns down the volume of a track when another track's volume goes up. Deep house tracks often have lots of elements sidechained to the kick - which creates a very cool pumping effect. But what if we want to have a sidechain effect during parts when the kick isn't playing? That's what a separate Sidechain track is useful for. Fortunately making it is very simple:
(Make sure you're in the Arrangement view first - click Tab a couple of times to make sure you're in the horizontal mode. It's the mode we're going to work in today)
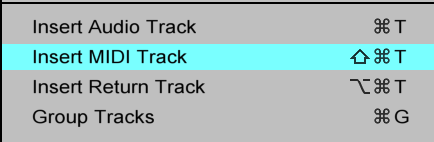
1. Create a new MIDI track - right click anywhere and select Insert MIDI Track.
2. Press Shift+Tab a couple of times to make sure you're in the Effects Chain view - it should say "Drag an Instrument or Sample Here"

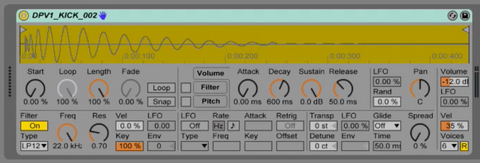
3. Select a kick sample in your browser on the left and drag it there. We used a sample from our Deep Premium sample pack which you can find here - you can use your own samples if you like.
4. Insert a new MIDI clip - to do that just select a part of the newly created track, right click and select "Insert MIDI Clip"

5. Select your view and go to the Clip view by pressing Shift+Tab. Now, place a C3 note on every 1/4 of the bar. C3 is the root note in Ableton, we don't want the kick to be transposed up or down.

6. Extend the clip by dragging its sides onto your whole project. This way the sidechain track will always play.
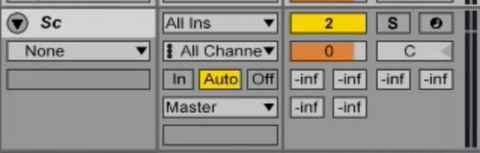
7. Mute your sidechain track by clicking the yellow "Track number" on the right.
Voila! You've just made a sidechain track and you're good to start the production process.
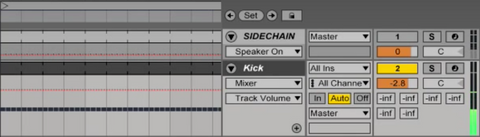
II. Kick
Now that you've got a Sidechain track, making a Kick track is easy as pie. To make it just duplicate your Sidechain track (click on it and press Cmd+D). All you have to do now is just un-mute your Kick track and you're good to go.
III. Snare
1. Make a new MIDI track, just like with the Sidechain track.
2. Create a new MIDI clip and extend it over your project.
3. Drag a Snare sample onto your MIDI track (we used a sample from Deep Premium - DPV1_SNARE_DRY_009)
4. Go into the clip view (Piano Roll) and place the snare on 1/2 of every bar.
This is what we have so far: a basic Kick - Snare pattern.
IV. PreSnare
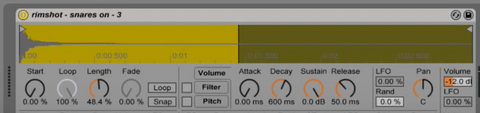
To make the beat more interesting, let's add a PreSnare. I inserted this Rim sample onto a new midi track:
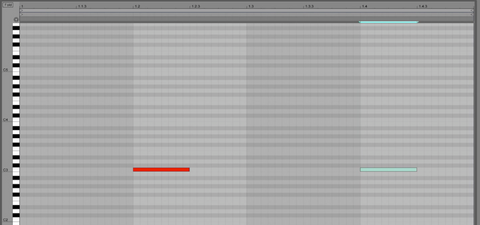
Let's make another MIDI Clip, and this time let's play only one note in a bar - place it just like in this picture:
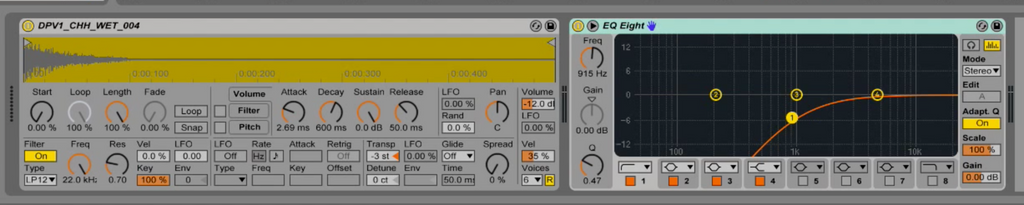
Let's also add two audio effects onto this track by dragging them from the browser - EQ Eight and Redux. Let's set the EQ as a lowpass filter and let's set the Redux to Hard and the dowsample setting to 10.

This is what you should have so far:
V. Closed Off Hat
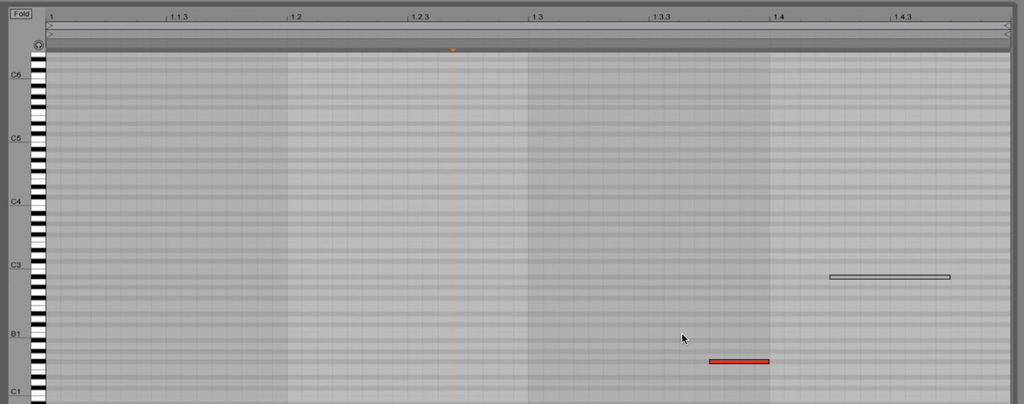
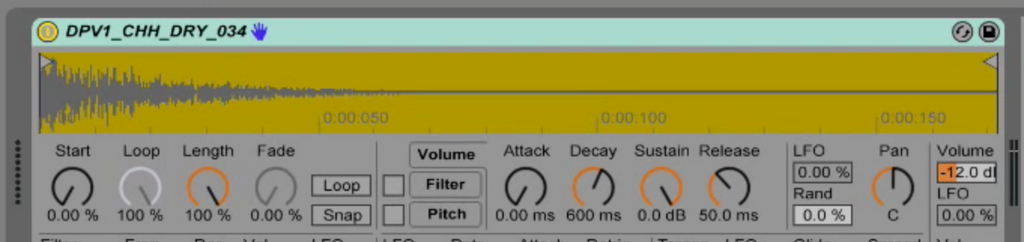
Let's add a hihat element onto the track. To do that just repeat the usual process of adding a new MIDI track, but add a hihat sample instead:
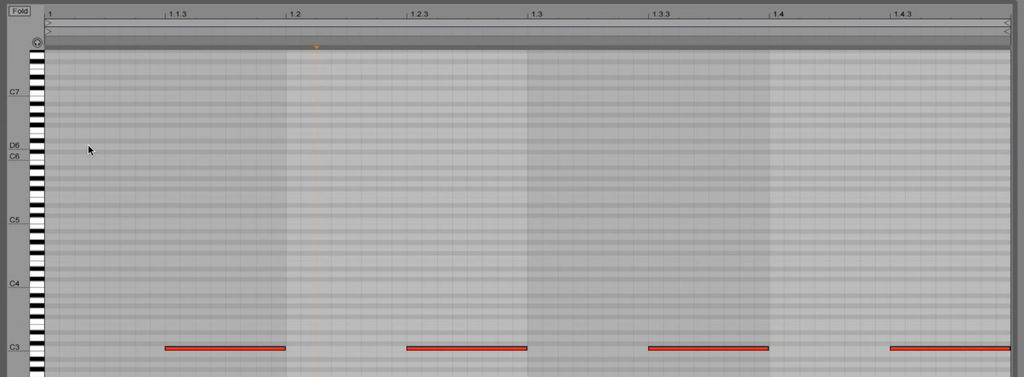
Let's add a MIDI clip and place MIDI notes at 1.1.3 - 1.2.3 - 1.3.3 - 1.4.3.
Let's hear the beat with the hihat:
VI. Closed Off Hat 2
Let's layer this hihat with another hihat sample. For this purpose we'll use a more open hihat sample (it's still a closed hihat but it sounds pretty open). Notice that I'm removing the low frequencies with an EQ Eight.
The MIDI information here is exactly the same, so you can just duplicate your Hihat track and change the sample.
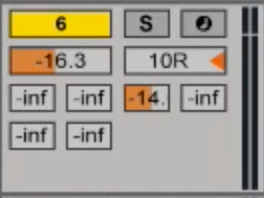
I'm also sending the track into a return track, which acts as a reverb. I'm doing it with this send fader over here (it says "-14"). This way you can send more tracks to a single reverb effect to save your computer some processing.
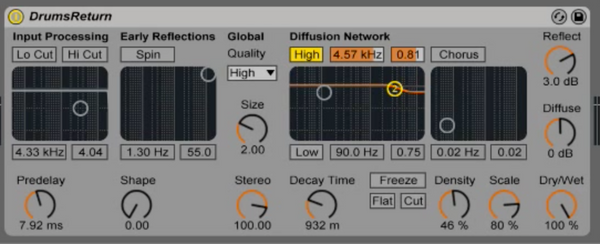
Here's my Reverb settings on the return track:
Here's what you should have so far:
VII. Dynamics Hat
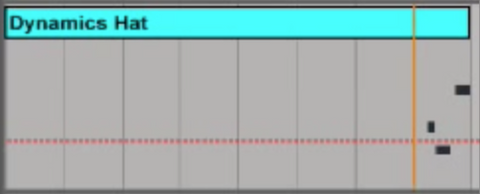
Let's add another layer of hihats, this time just three hits at the end. I put another hihat sample onto a new midi track, and rolled out the low frequencies with EQ8.

Let's hear the ending of a bar with this element:
VIII. 16th Hihats
A final layer of our hihats is going to be a very sharp sounding hihat placed on every 1/16 of each bar. Notice how I adjusted the volumes of the notes by dragging the lines below the Piano Roll.
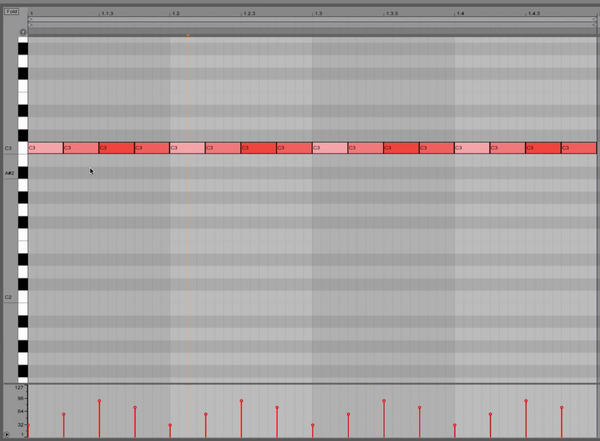
I also added a Sidechain Compression effect onto this track and set it to the Sidechain track - every time the kick hits there, the hihats go quieter. I also placed a Chorus effect onto this track to widen the sound.

Let's hear this element in context:
IX. Blip
Next, I added a Blip sound into the beat. It adds some more variation to the groove.

Let's hear what it sounds like with the beat:
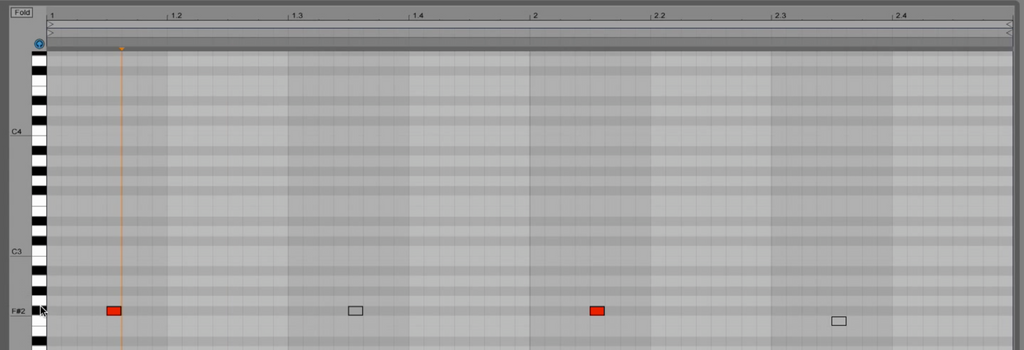
X. Ride
The last drum element of this track is going to be a Ride sample. Let's add it onto a new MIDI track and place it at the end of the bar like this:

Sound preview of all the elements:
That's all for the drums. Congratulations for completing this part of the tutorial! You can continue to part 2 next. (k-pizza)
|
More Info: - Grab this Ableton Live project file - Grab the Easy Start Pack for Ableton Beginners - 4h+ Beginners course: Producing a TRACK from START TO FINISH |
keywords: Ableton Live Template, beginners tutorial, beginners guide to ableton, how to ableton, how to write music in ableton, how to make a track in ableton