
Hi. Today I’m going to show you how to make very simple trap drum patterns. This is going to be for people starting out or new to the genre.
Here’s the beat that we’re going to be making:
Let’s get started!
1. Download our FREE SAMPLE Pack
First of all, grab our free sample pack with sounds that we’re going to be using. It’s in out Free Downloads Page under the name „Start in Ableton: Trap Drum Beat”.
You can also check out the Trap Production Pack with 190+ Samples, MIDIs, Instruments and Scales.
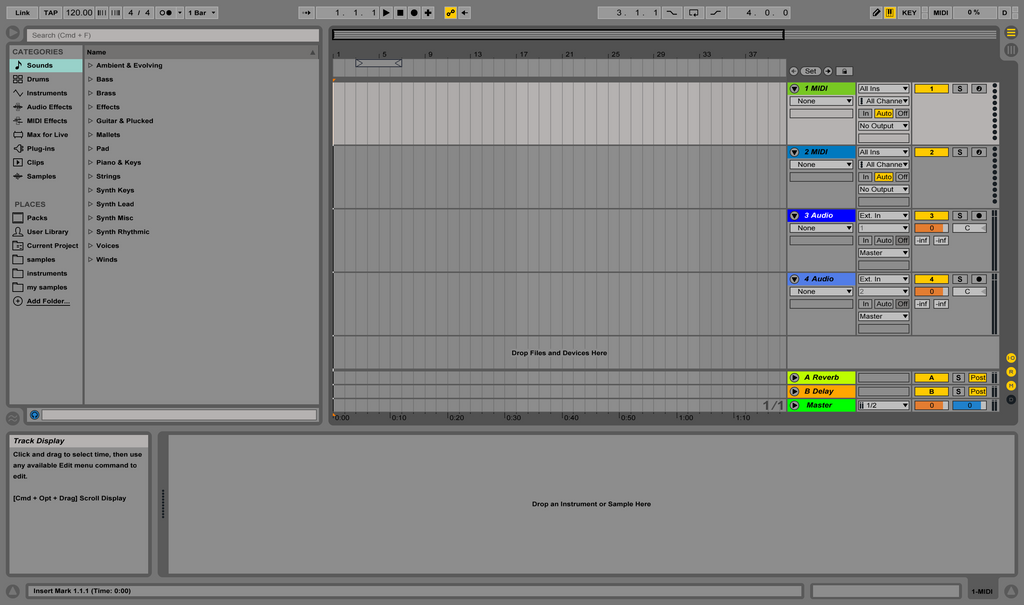
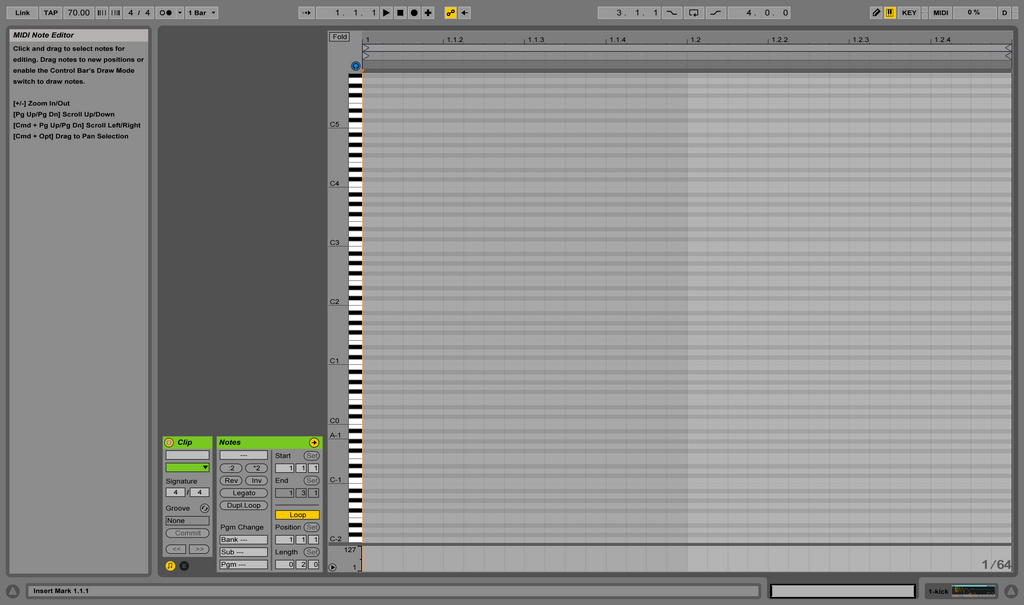
Then just open up Ableton and follow my steps. Here’s what Ableton looks like when you open it up for the first time.

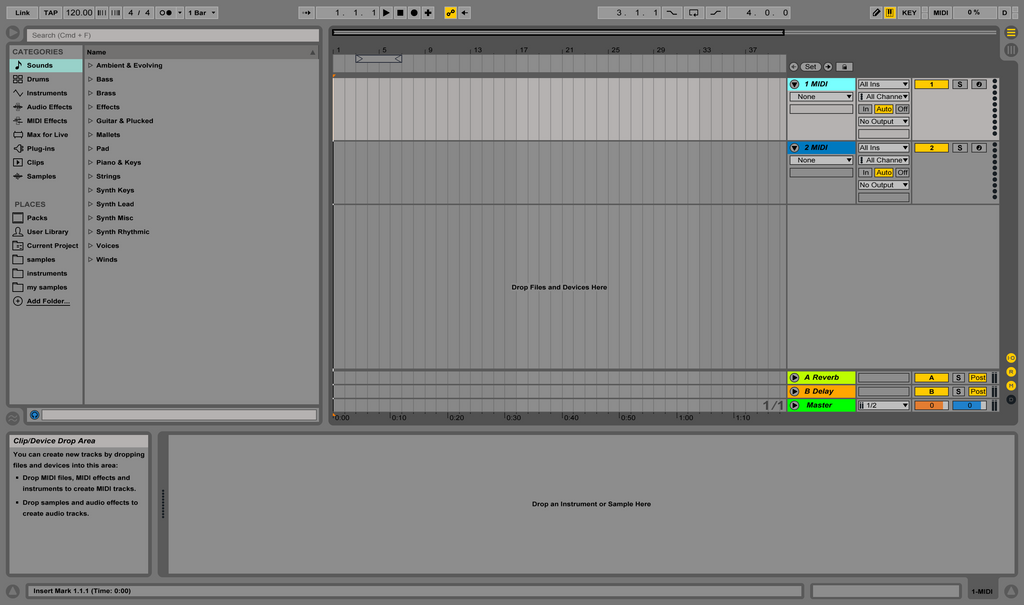
This is a view called Session view. Here you can find a tutorial of me making a beat in Session view, but for this tutorial, we’re going to switch to the second view called Arrangement view by pressing the Tab key on your keyboard.
See this article for the top 5 elements of every trap beat.
2. Select the MIDI Tracks
Now you’ll see 4 tracks: 2 MIDI tracks and 2 Audio tracks. In this tutorial we’re going to be using only MIDI tracks, so you can go ahead and delete the Audio tracks straight away. Just click on their names and press backspace or delete.
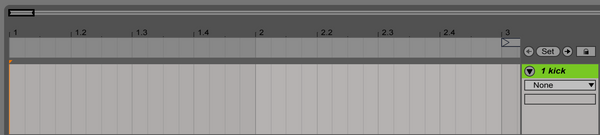
Now make sure you have the first track selected and go to our free samples folder. Find a „kick.wav” file and drag it onto the bottom of the screen like this:

— You can see the sample placed in the bottom left corner of the screen. —
That will load up the sample into a device called Simpler. Bear in mind that I’m using Ableton 9.5 - on older versions Simpler will look a little bit different.
Check out our MASSIVE preset pack for Trap!
3. Set the Tempo
Before we form a kick pattern let’s set the tempo of our track to 70 BPM - click this box in the upper left corner and type in „70”.

Now let’s zoom in at the first bars. To do that click the dark grey area above the timeline. As soon as the mouse turns into a magnifying glass, click and drag it down and you’ll zoom in.
4. Make a Drum Pattern
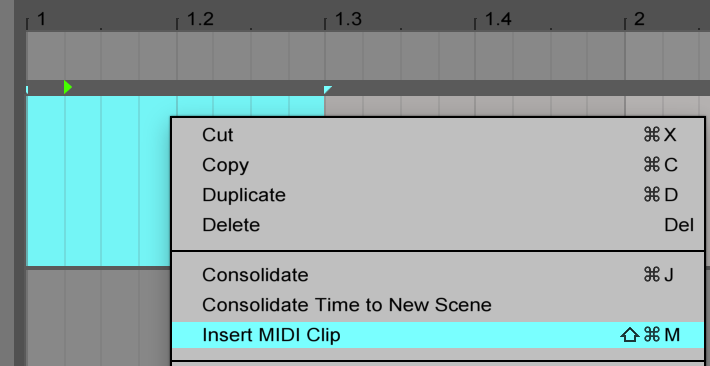
Now we’re going to add a blank clip onto our track so that we can make a drum pattern. Select half of the first bar (from 1 to 1.3 on the timeline), click in the upper area of the selection and from the dropdown menu select „Insert MIDI Clip”.
Now, to make a pattern in the clip click on it and press **Shift+Tab** to go to the Clip View.
Now add two C3 notes into the clip by double clicking at the very beginning and at 1.1.4. The reason why we’re inserting C3 is because the higher the note, the higher the pitch of the sound. C3 will always give us the default pitch of the sound.
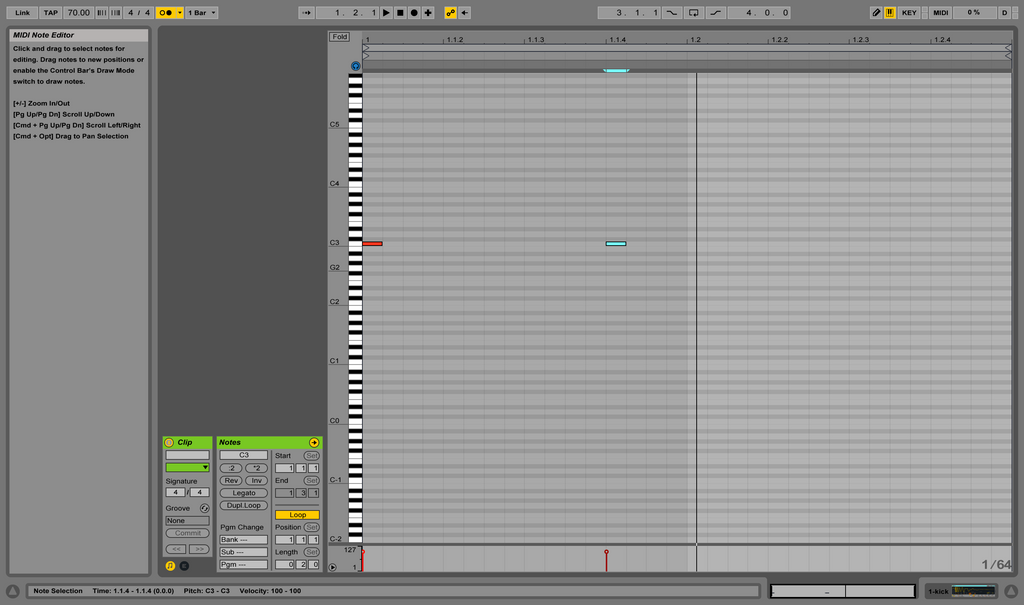
Now that we have a kick, go back into the Arrangement (Shift+Tab) and extend the clip over the whole bar.
If you click at the beginning of the track and press Space, you should hear this basic kick pattern:
See this video tutorial with making 3 beats in under 30 minutes.
5. Add a Snare
Now let’s make a snare. For this purpose select the second track and drag the „snare.wav” sample onto the bottom. Just as with the kick, repeat the process of adding a new MIDI Clip and going into the Clip View.
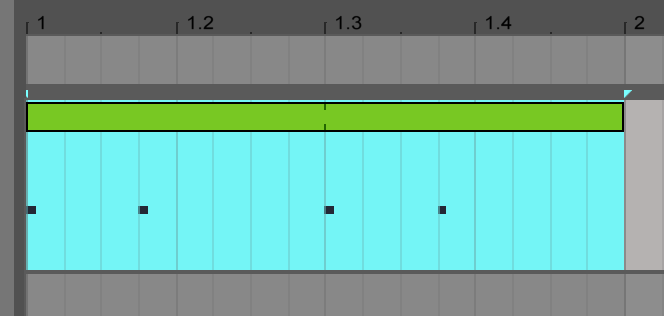
Now insert the Snare sample in the middle of the Clip and extend it by grabbing the red block’s right end. That way we’ll play the whole sample.
Now if you extend the snare over the whole bar it should sound like this:
Sounds more like drums, doesn’t it? Now we’re going to add a hit to add some groove.
See this Trap temlpate inspired by Mr. Carmack!
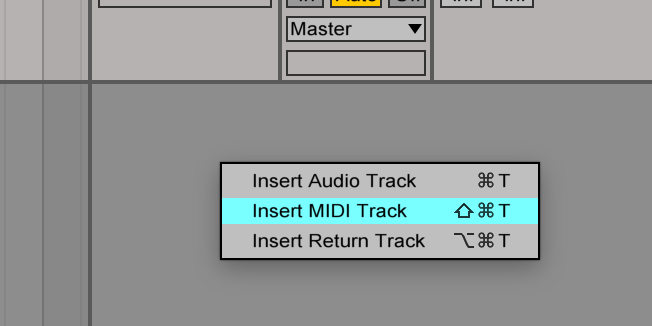
6. Make it Groovy
Insert a new MIDI track by clicking in the grey area under our two tracks and selecting „Insert MIDI Track”.
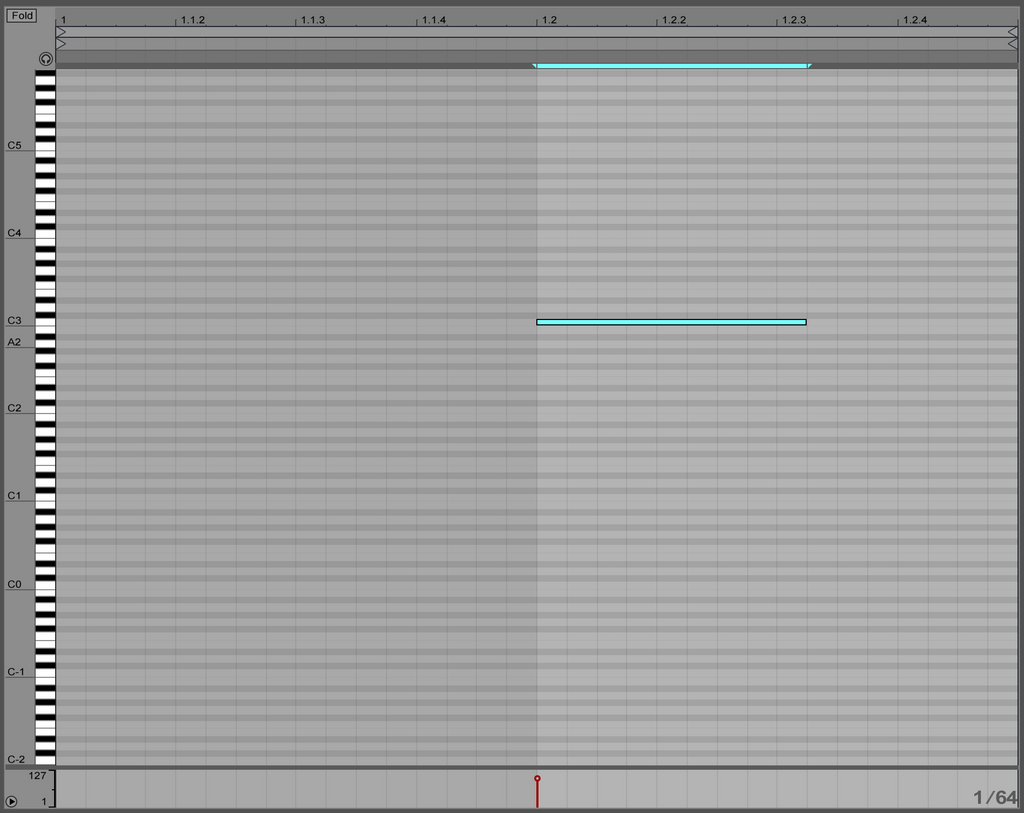
Now drag the „hihat.wav” sample onto the track and as usual create a new MIDI Clip and go to the Clip View.
This time we’re going to insert a C3 note all over the clip. To do that, just insert a note at the very beginning of the clip and extend it until the end. As usual extend the Clip in the Arrangement over the whole bar.

After that you’re going to have to find „Arpeggiator” in MIDI Effects on the left of the Arrangement.
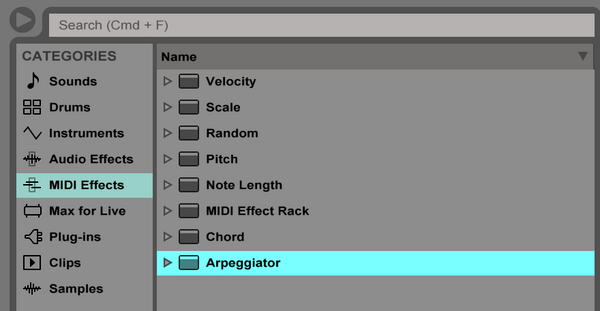
Double click the Arpeggiator and it will show up on the left of the hihat sample.
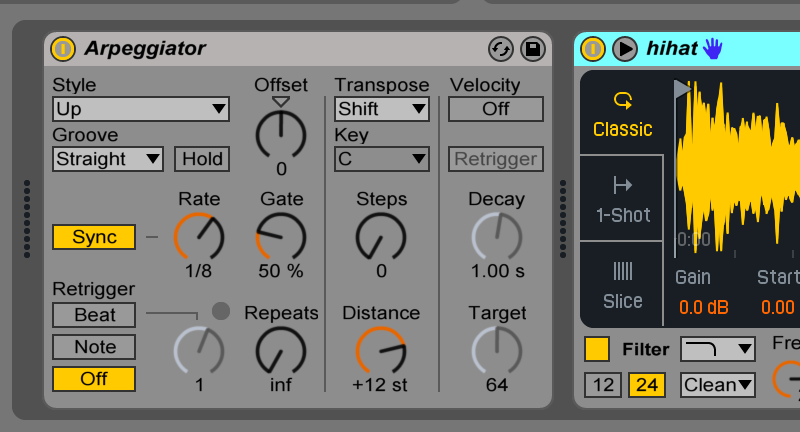
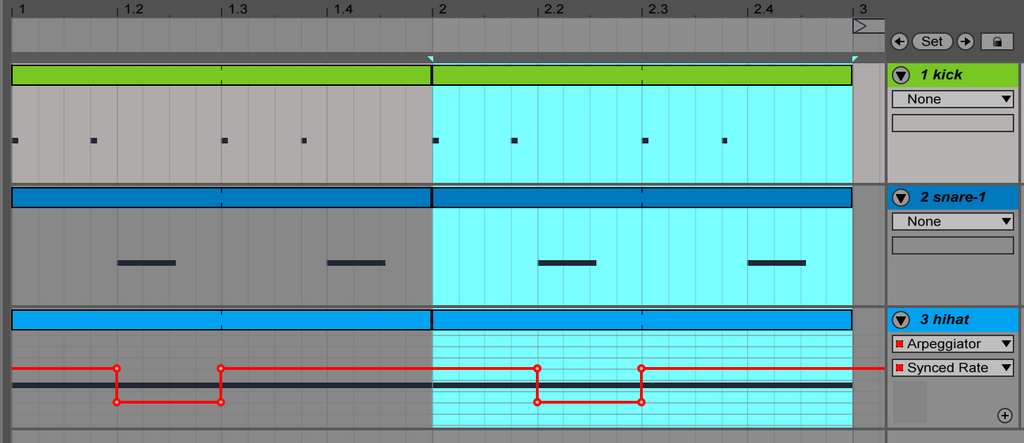
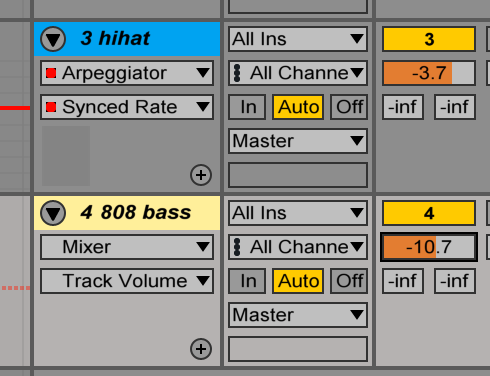
Be default it’ll play 8th notes for us. Find the „Rate” knob and change it to 1/16. It will play two times faster.
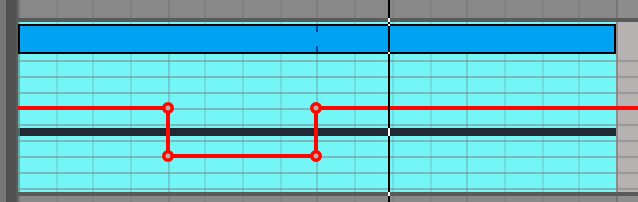
I’d like the hihats to play faster after the first snare. To change that, first we need to select the area in which we want the hihats to speed up:
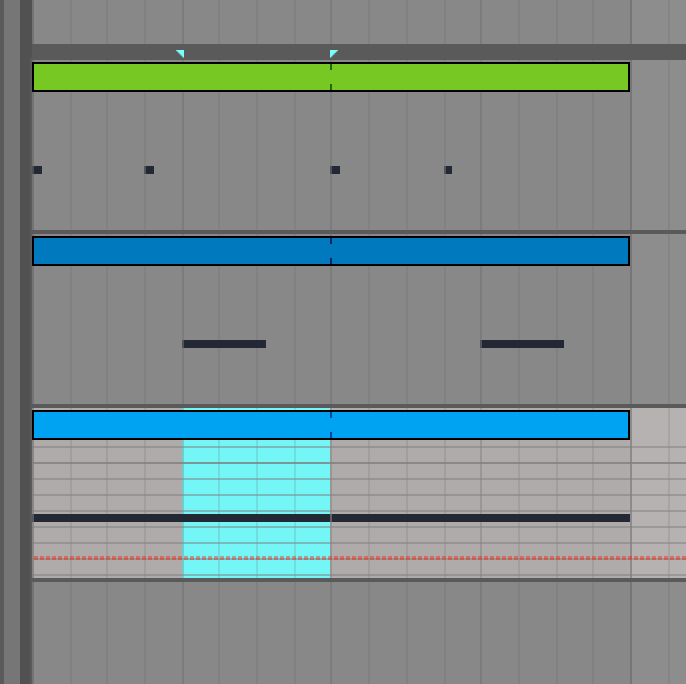
Now place your mouse just under the red line across the track and drag it down by 3 steps.
7. Insert Cool Bass Notes
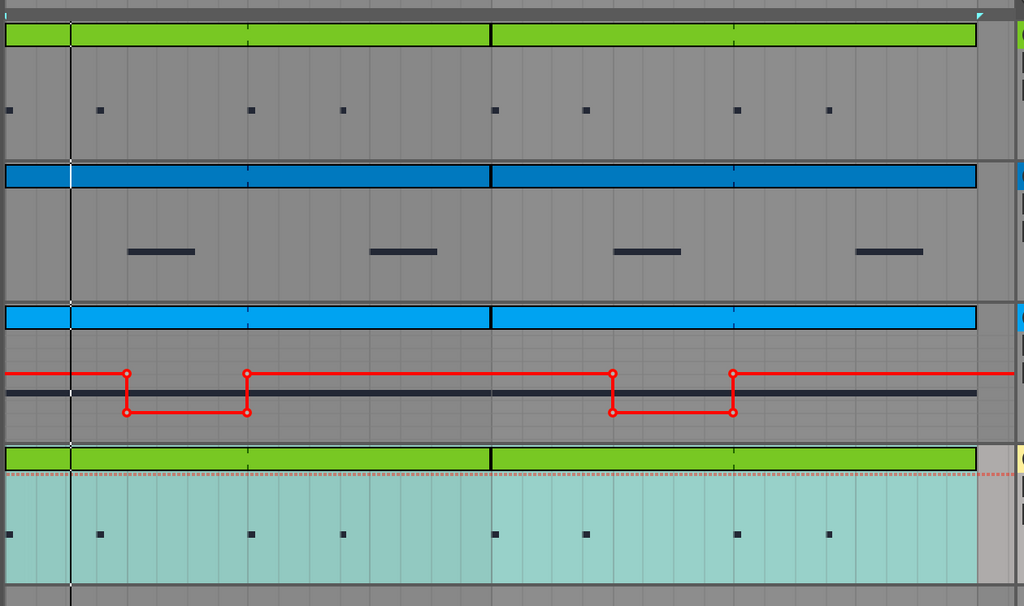
Before we get insert some cool bass notes let’s select all the tracks and click Cmd+D [Mac] / Ctrl+D [Win] to duplicate them twice.
Now to add some bass simply create a new MIDI track and drag the „808 bass” onto it. 808 is a common term describing a long bass sample.
This time though, we’re going to copy the MIDI clips from our Kick track to our 808 bass sample. That way every time a kick hits, the 808 bass sample will play. Just select the clips on the Kick track, copy them (cmd/ctrl+C) and paste onto the Bass track.
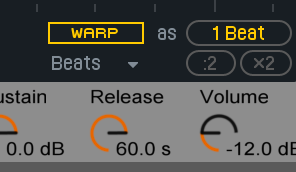
Now you still won’t hear any sound from the bass until you crank the Release knob in Simpler.
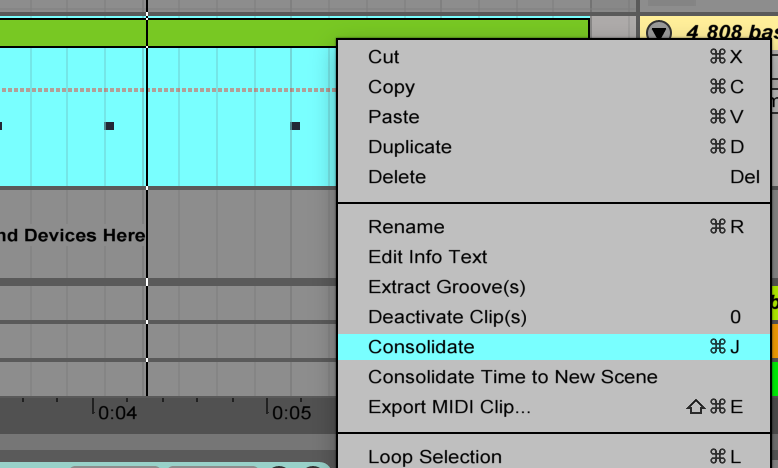
Now let’s change the pitch of the last 4 bass notes. To do that, right click on our second Bass clip and select Consolidate.
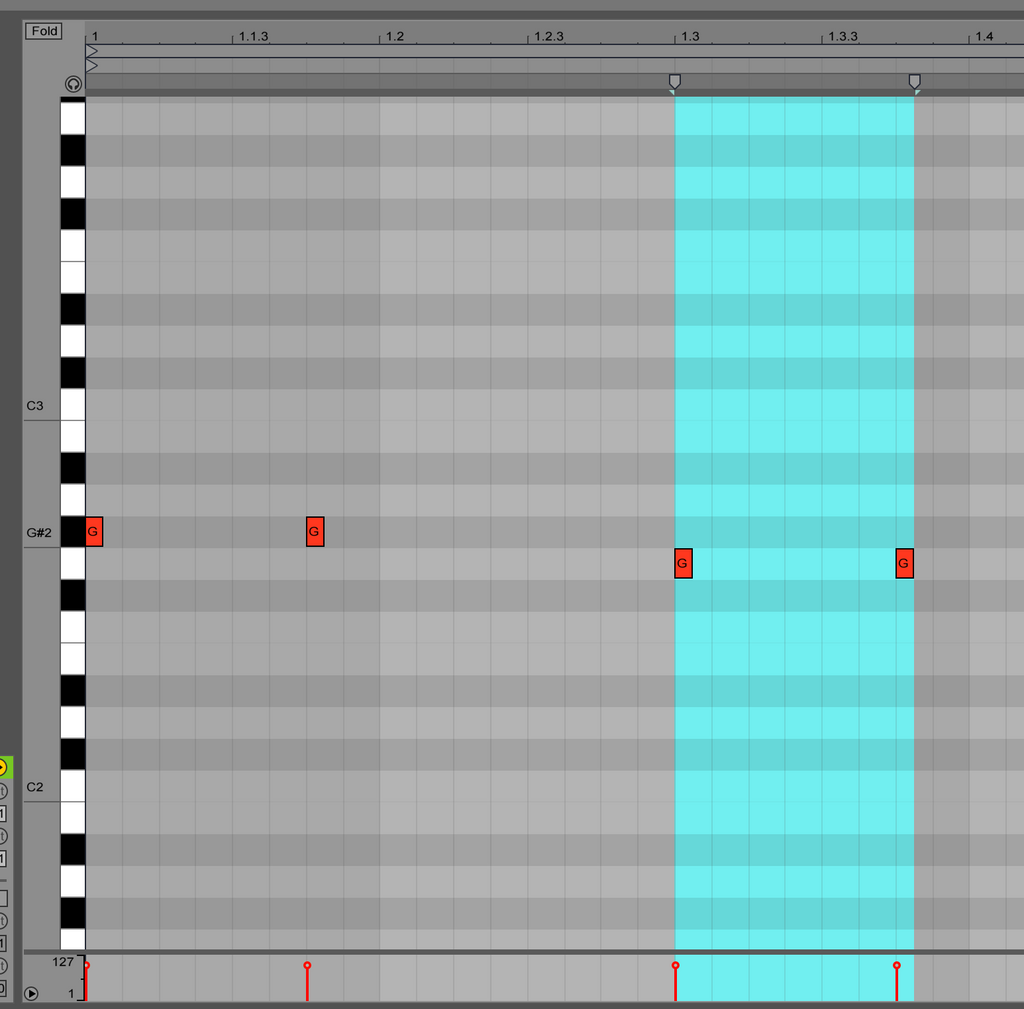
Now go into the Clip view and change the pitch of the first two notes by -4 semitones (G#2) and the last two by -5 semitones (G2). You can zoom in by clicking and dragging the light grey area (on the left of the piano) RIGHT.
Now, back in the Arrangement if you select the whole 2 bars and click Cmd/Ctrl+L, the beat will be loop.
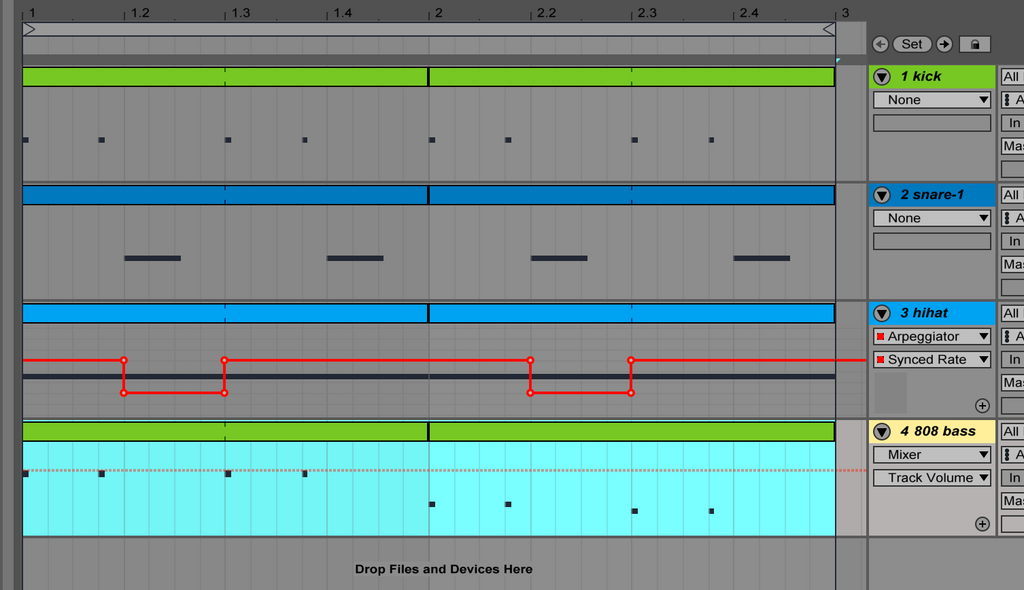
Final result:
Thanks for sticking around until the end! If you’d like to go further and learn more, make sure to check out my new e-book called „Making a Beat from Start to Finish - Beginner’s guide to Ableton”.
Author: k-pizza
I’m a music maker who likes to share his experiences with other producers. I regularly show up with tutorials, articles & project files at PML.
Skype lessons with me: http://bit.ly/pml_s_one2one
________________________________________
Keywords:
Making trap drums Ableton and / or making Ableton trap beat. This is a written Ableton trap tutorial, explaining how to make a trap beat in Ableton Live 9. How to make trap on Ableton Live 9. Trap drums tutorial Ableton and Trap drum patterns Ableton. Or in other words, making trap beats in Ableton. This could be called: Ableton Live 9 Tutorial Beginner. Or: Ableton Live 9 Tutorial Hip Hop as well as how to make hiphop beats on ableton live 9. Another way of putting it is: how to make trap beats on ableton live 9 / Chill Trap in Ableton / Ableton beginners guide / start in ableton live / ableton live drum beat.