Hi! If you’re a beginner and you’d like to finally make some future bass, this tutorial is perfect for you. Today we’re going to make a future bass drop from scratch. The end result of this tutorial sounds like this:
Whether you like the end result or not, I think there will are a couple of good production techniques in this tutorial, which will help you in making future bass for sure.
Make sure to check out our 5+ hour video course tutorials on creating the extended full version of this Future Bass track from Scratch!
Let’s get started then!
The track will consist of 5 elements (tracks), from which the first one will be:
1. Main Synth
We’re going to work in the Session view, so make sure to click the Tab key to go to the vertical view (with columns instead of horizontal tracks)
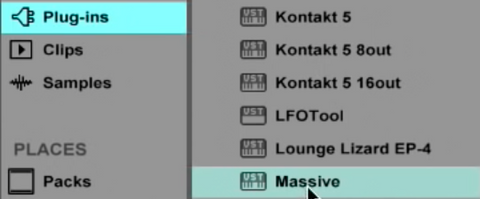
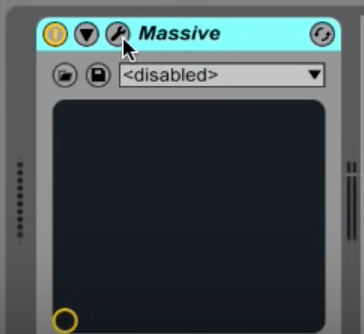
At first, we will drag Massive to a new MIDI track.
To do that, go to your MIDI track, then to Plug-ins and double click Massive.
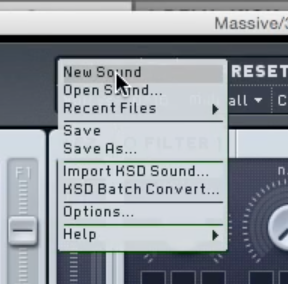
Now go to File > New Sound (in Massive) to open up the Init patch.
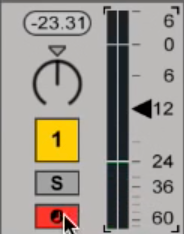 And just take down the volume of the track to -12. That’s just my preference, I like to start working at -12dB.
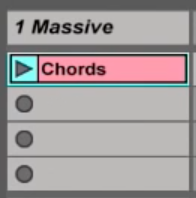 Alright, we’ve got the basic sound set up. Now let’s create a new MIDI clip by double clicking a slot on your track. I renamed it to „Chords“ by selecting it and clicking Cmd+R.
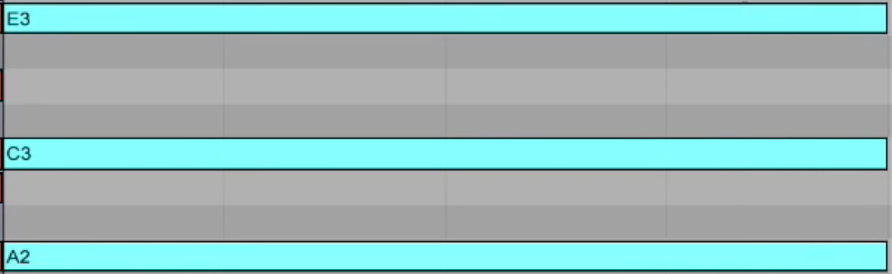
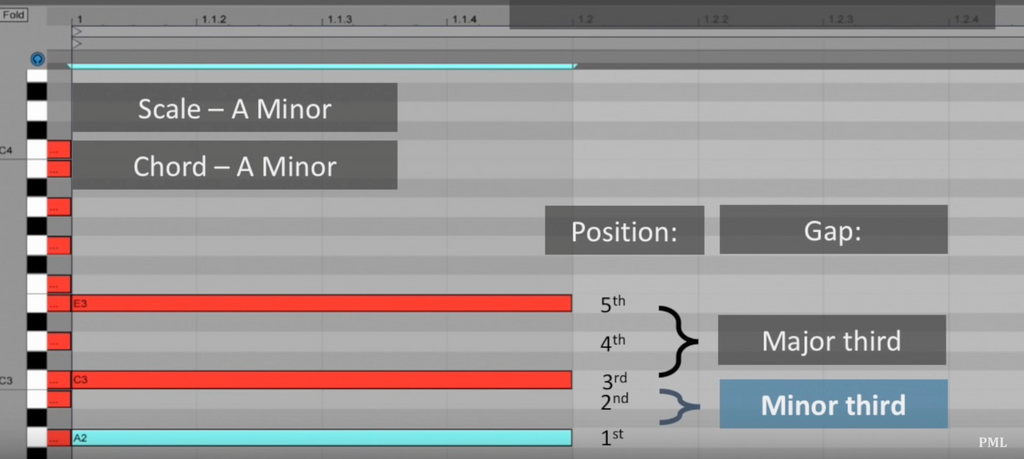
Now select your clip and press Shift+Tab to see the Piano Roll. We’re going to work in the A Minor scale (because it doesn’t contain any black keys, it’s easier for beginners that way). Let’s insert a couple of notes into the Piano Roll by double clicking and extending them. Let’s form a basic A Minor chord at first (A2+C3+E3)
Here’s some information on how these notes form a basic minor chord. This topic is explained deeper on our Harmony and Chord Progressions course.
"Harmony and Chord Progressions" - Learn more about our new self-paced course!
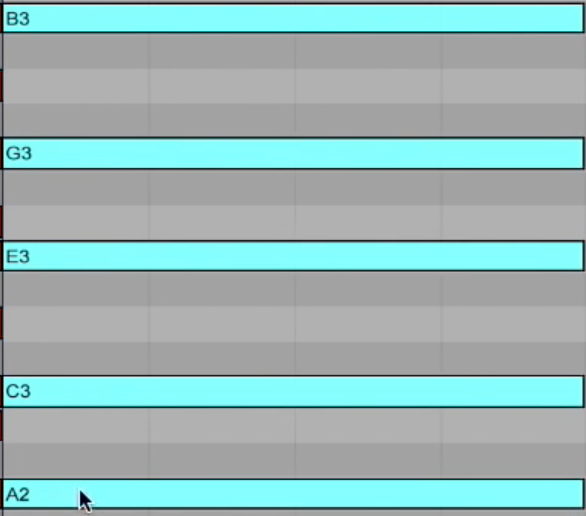
Now, I added a 7th and 9th note to the chord and formed this shape:
I also duplicated the chord shape a couple of times by selecting them all, holding alt (option) and dragging the base note to E2, G2 and D2. I also extended the length of the chords by clicking the *2 button twice (it’s on the left).
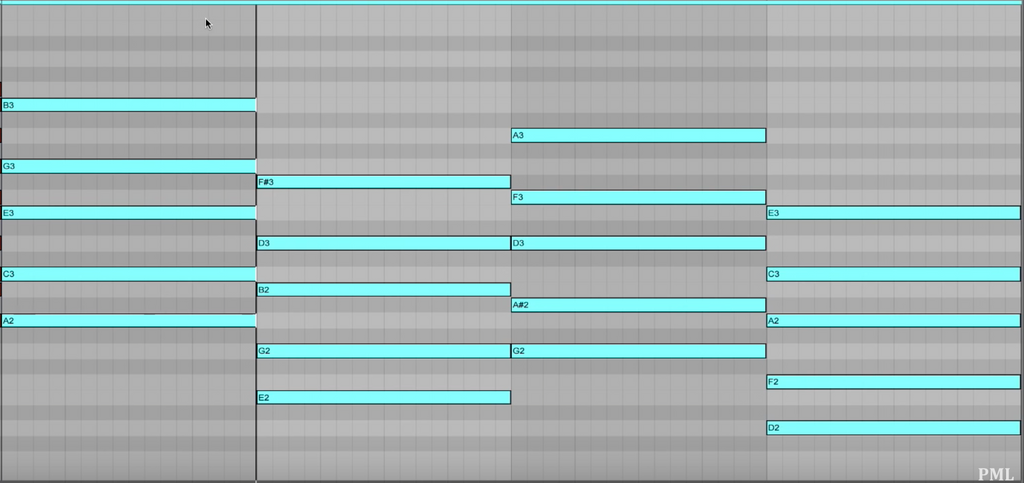
Now I just moved some notes to higher octaves to form more interesting chord shapes. To do that, simply select a note, click shift and up/down arrows to switch octaves.
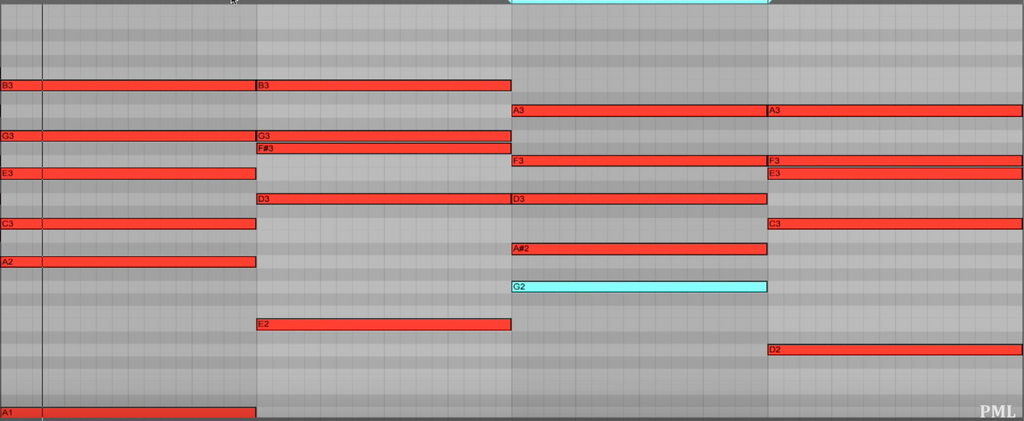
If you did everything correctly up to this point, your clip should sound like this:
 Let’s work on the sound of the synth now. To do that, open up Massive (Shift+Tab to switch to this view)
![]()
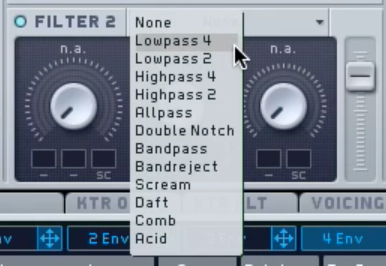 Now turn on the Lowpass 4 filter and turn the Mix all the way down (to position 2), so that all the sound goes through the filter. Also, set the first (Square-Saw oscillator) to F2 (Filter 2). You can move around with the Cutoff knob and you’ll hear that we are cutting off the high end of the sound with the filter.
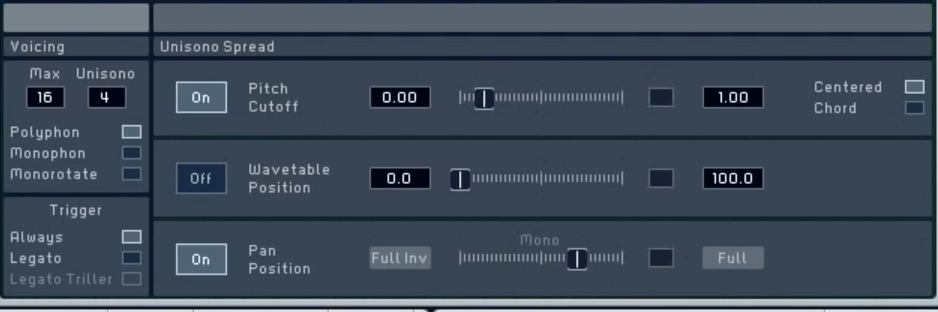
You may want to turn down the volume a bit now. Let’s now go into the Voicing tab in Massive and turn on the Unisono to 4. That way not one oscillator will be playing, but four of them at once. Next, go turn on the Pitch section and detune the oscillators a little bit to give it more space. You may also want to pan the sound a little bit to the right to give it more of a stereo feel.
The synth should sound like this by now:
 Let’s add an LFO to the synth now. To do that, drag down the Cutoff of the filter first. Next, go to the green 5 LFO button and drag the 4 arrows sign to the Filter Cutoff. Open up the LFO amount by clicking and dragging up the number 5, which should appear at the bottom of the Cutoff knob.
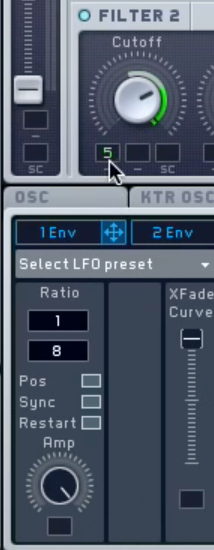 Mess around with the cutoff knob and the LFO amount to find a good sounding position (this is what I came up with) Also, make sure to set the ratio of the LFO to 1/8 by clicking the Sync button and dragging the second square with number 1 to 8. That way we’ll go from 1/1 (one LFO movement per bar to eight of them) After that, quickly turn down the Amp knob of the LFO, we’ll take a look at something else now.
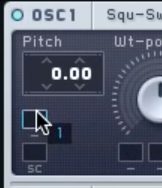 Next thing: we’ll do a little bit of a pitch movement effect. To do that, go to the 1 Env section and drag it to the first oscillator.
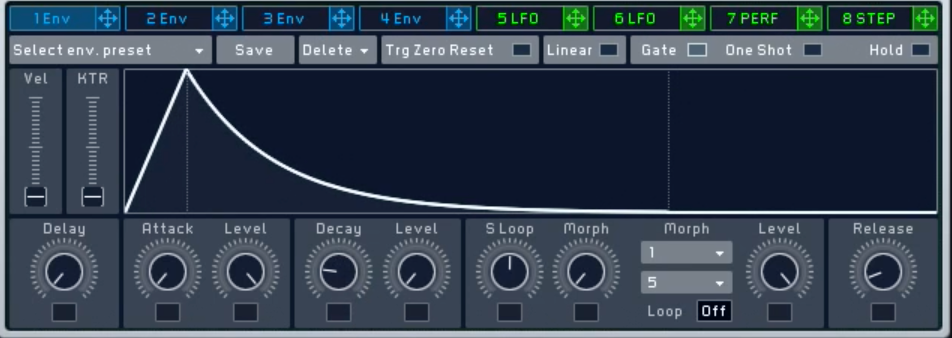
Now, you can control the speed of the pitch effect with the Attack and Decay knobs of the first Envelope. This is the result I had so far, and the shape of my envelope:
Now you can bring up the Amp knob of your LFO.
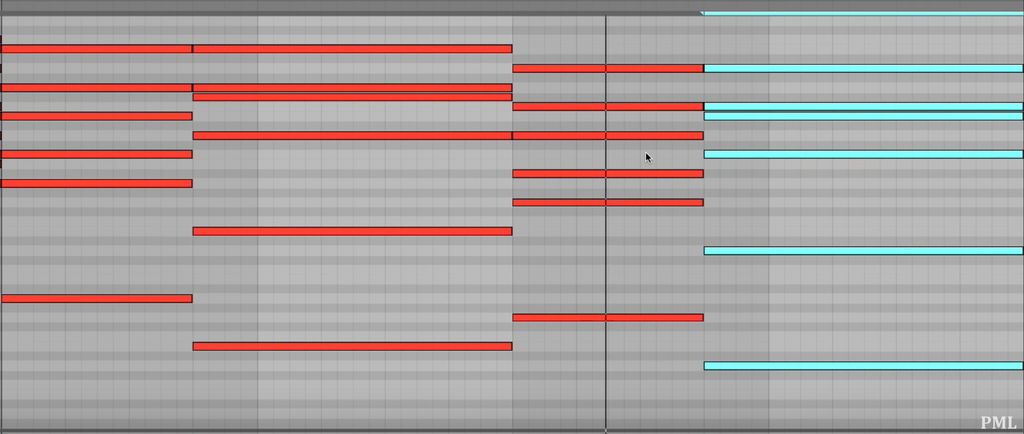
Let’s close Massive and take a look at your clips. Duplicate the first clip by selecting it and clicking Cmd+D. Now set the lengths of the notes in the second clip to something like this (to make it more interesting)
Well done! You’ve completed the first part of the tutorial. Now there are easier parts like drums, bass and an Arp Synth to create to finish this cool future bass drop. See you in the next part here!
Make sure to check out our 5+ hour course video tutorials on creating this Future Bass track from Scratch!
Here is what the end result of that course sounds like!
See more articles on Future Bass: